+ Partsfps Kitchen Equipment: star mfg international
Showing posts with label star mfg international. Show all posts

Friday, November 5, 2021

How To Clean A Hot Dog Roller Grill ?

 A commercial hot dog roller is the best choice when you want to heat a large batch of hot dogs or sausages. So, many foodservice centers such as restaurants, convenience stores, and stadiums use these hot dog roller grills. However, you should focus on maintenance to keep your unit in great working order. Also, proper cleaning ensures a clean environment in your establishment. The following tips will instruct you on how to clean a hot dog roller grill.


How to Clean a Hot Dog Roller Grill?

Many people know about how to use a hot dog roller but they don’t aware of its cleaning process. So, here, we have updated some simple steps to clean the hot dog roller grill.

Regular Cleaning:

If you serve a lot of hot dogs, wipe down the machine every few hours to prevent a high amount of food residue as well as fat that is stuck to the rollers. Here are some easy instructions for the daily cleaning of hot dog roller grills.

When the grill is off, turn on rollers and set the temperature to high, and let down rollers to heat until loosening grease and particles stuck to rollers. Otherwise, remove the divider kit to get access to rollers if applicable.

Before you begin, you should use heat resistant gloves to avoid burning hands or fingers while wiping down.

You have to use a soft damp cloth to wipe each roller. Start the wiping from the end of the grill and go towards the middle. You should not wipe into the end of the roller as this will cause to get the grease and particles into the bearings so that they may damage the machine mechanics. Moreover, as abrasive materials damage the coating on the rollers, never use abrasive materials or any powders to wipe down the grills.

Once the grease and particles are removed, wipe the grill full of soapy water using a soft cloth as per the above step. This step is optional when you clean the machine between every use.

Cleaning at End of the Day:

Follow these directions to clean and sanitize the unit each day after use.

With the roller off, you have to remove the plug and allow it to cool before starting the cleaning.

Moreover, remove any hot dogs that are remained on the roller.

Check for the machine at its highest temperature setting and ON the rollers. The highest heat setting helps to remove the grease and food particles from the machine,

After five minutes, change the heat setting to "low" or "hold". Now, using a soft cloth dampened with mild soap and hot water or cloth filled with ice wipe down the rollers. You should wipe with cloth from the edge to the center of the roller for avoiding grease and particles from getting to the bearings. Never use oven cleaners or abrasive materials on non-stick roller assemblies.

After completion of wiping down the rollers, soak the cloth in soapy hot water. Again clean the rollers with this cloth with the following of the above step.

Once it is finished, rinse the roller grill with a separate soft cloth.

Separate the drip pan or accessories and clean them thoroughly with hot water and mild soap.

Also, clean the outside of the unit with a soft cloth dampened with mild soap and hot water. You can wipe these stainless steel parts with a cleaner like gold medal watchdog stainless cleaner. You should not use oven cleaners as they will damage hot dog roller parts.

Now, let it down for drying completely, or use a dry cloth to dry completely.

Once the unit dry, you can install the removed drip pan or parts on the roller.

Roller grill cleaning pads and holders also available in the market for cleaning your machine. If you need any hot dog roller repair or replacement, you can take the help of an authorized service technician.

Final Words:-

Hope you got the instructions on how to clean a hot dog roller grill. Still, if you have any doubt, you can check your manufacturer's manual to get detailed instructions. Remember that PartsFPS provides you original hot dog roller parts for replacement needs.

Friday, October 22, 2021

Star Deep Fryer Troubleshooting

Star Manufacturing deep fryers are important in most commercial kitchens. And, it's common to experience malfunction once in a while. That's why it is important to know some of the most common Star deep fryer problems and their fixes. It's easy to fix the basic issues that come with your fryer. Let's start reading a few problems and tips to solve the problems of Star Mfg deep fryer.


Star Deep Fryer Troubleshooting Guide

Find the simple solutions to fix the basic Star fryer problems

Deep Fryer Pilot Won’t Light/ Pilot Light is Out

If the fryer's deep pilot light is out, you can consider that your unit is completely out of condition. The oil does not heat up to its right temperature without a pilot light. There are many reasons behind the deep fryer pilot light out. But, mainly due to the main gas supply valve issue, this problem will occur.

Check the supply line for any blockages, this is the best choice to confirm that problem is with the gas supply valve. While inspecting, if you observe that the supply valve is open and clog-free, then you have to replace the thermopile. The thermopile works as a main heating element in the fryer that converts thermal heat into electric energy. Therefore, signaling the pilot light to ignite the flame. It is fairly simple to replace the thermopile. If you are unable to replace it, contact a professional.

Thermostat Failure

If you are seeing temperature fluctuations when using the Star Mfg deep fryer, it might because of a defective thermostat. When the temperature is off, it's likely that the fryer will continue to burn or undercook your fried and correct recipes until the problem is fixed.

If you notice any problems with the heating capabilities of oil, you should place a probe-style thermometer inside the oil for testing its average temperature. When you are testing, the temperature must be consistent. If the oil temperature is inconsistent while testing, you will need to re-calibrate/ rewire or replace the internal thermostat. Also, check the wires behind the fryer thermostat are disconnected. If so, connect them properly.

Hi-Limit Switch is Not Working

Sometimes, you may get problems with hi-limit thermostats. Hi-Limit thermostats are placed inside the fry tank near the burners. Like an internal thermostat, the hi-limit switch caused to not heat the frying oil to its arranged temperature. If this switch is a reason for your deep fryer's inconsistent oil temperature, replace it to resolve the issue. If you don't know how to replace the hi-limit switch, you can call a service technician.

Poor Oil Circulation

If the fryer oil filter fails, the flow of oil will become weak and makes it impossible to complete the deep fry food successfully. You will hear and see the oil circulation sound when your Star deep fryer is turned on if it's filtration pump is operating properly. If your oil flow becomes weak, you can simply change the oil filter. Sometimes, this will work effectively. But, in some situations, the O-rings could not fully tight & secure. Damaged O-rings often interfere with a stable air pressure balance. So, you should fix them carefully even it is easier. Otherwise, need a professional technician to get complete functionality.

Conclusion

That’s all about a few common problems of your Star manufacturing deep fryer issues and their solutions. Hope, this Star commercial deep fryer troubleshooting tips helped you while fixing basic problems. However, it’s necessary to follow regular maintenance to avoid these types of common problems. If you need further more assistance regarding Star deep fryer troubleshooting, you can refer to the manual. For replacement or repair needs, buy Star Mfg fryer parts at our store.


Sunday, October 17, 2021

Blodgett Oven Installation

Blodgett ovens represent the latest advanced technology in energy efficiency, reliability, and ease of operation. In these ovens, heat is normally lost and is recirculated within the cooking chamber before being vented from the oven that resulting in substantial reductions in energy consumption and enhanced oven performance. However, in this blog, we have updated the process for Blodgett oven installation. Take a look at this complete post.


Blodgett Oven Installation Procedure

Cooking in a Blodgett convection oven is different from cooking in a conventional deck or range oven since heated air is constantly recirculated over the product by a fan in an enclosed chamber. The moving air continually strips away the layer of cool air surrounding the product and quickly allowing the heat to penetrate. The result is a high-quality product, cooking at a lower temperature in a shorter amount of time. Now, check out how to install a Blodgett convection oven. Before unpacking the oven, you should verify the damages in the package as well as unit.

Oven Location

If you placed the oven at the proper level. Then, it will give the long-term operator convenience and satisfactory performance. You need to maintain the below clearances between the oven and combustible or non-combustible construction.

Oven body right side - 1 inch.

Body left side - 1 inch.

Oven body back - 7.5 inches

Body bottom - 4.5 inches

Make sure there will be an adequate air supply to the oven to provide a sufficient flow of combustion and ventilation air.

The area where you have to place the oven that should be free of drafts.

Try to keep the area free as well as clear of all combustibles such as cardboard, paper, solvents, and flammable liquids.

Don't place the unit on a curb base or seal to a wall. Because this will restrict the flow of air and prevent ventilation. An excessive ambient temperature on the right side of the oven caused to tripping of the blower motor's thermal overload device. So, you should correct this condition to avoid permanent damage to the unit. Make sure, the location provides sufficient clearance for the air opening into the combustion chamber.

Oven Leveling

After completion of the assembling process, your oven should be leveled and moved to the operating location. It can be leveled by adjusting casters or feet located on the bottom of each leg.

On gas oven models, the installation of a proper ventilation system can't be over-emphasized. This system will remove unwanted vapors and products of combustion from the operating area.

Gas Host Restraint

If the Blodgett oven is mounted on casters, you should use a commercial flexible connector with a min of 1.9 cm inside diameter along with a quick-connect device.

You will get this restraint along with the oven that is used to limit the oven's movement. So, no strain is placed upon the flexible connector. Installation of the restraint with a fully stretched connector is easy and quick connect.

The restraint should be attached without damaging the building. Don't use the electrical conduit or gas piping for the attachment of the restraint's permanent end.

Mount the bracket to the leg bolt just below the gas inlet. And, attach the clip-on restraining cable to the mounting bracket.

Final Words

That’s all about Blodgett oven installation. However, the installation should be done by a professional or expert to avoid dangerous problems. If you need further more assistance, you can refer to your Blodgett oven manual. Installation instructions may vary from model to model.

Friday, October 15, 2021

Honeywell Water Heater Troubleshooting

 Honeywell Water Heater Pilot Light Won’t Light

Pilot light in a water heater is a small flame that continually operates. When you turn on your hot water tap, the hot water flows out to the fixture. When you need hot water, the gas valve will open up and the pilot light will ignite the fuel.

Whether the pilot light is lit or not, a small amount of gas will flow continually from the gas supply line. The pilot light would combust the gas and turning it into heat and flue gases. Without the pilot light, gas could continue to fill up your water heater closet or garage.


The status light may not blink due to many reasons including:

The pilot is not lit

Air in the gas line

The thermopile is not hot enough

Tripped thermal switch

Gas control valve wiring is bad or the connectors are loose

Thermopile is bad

The thermopile generates electricity in the Honeywell water heater that is needed to power the gas control valve. It will take up to 90 seconds to get hot enough to power the gas control valve once the pilot is lit. When it happens, the status light will blink once every 3 seconds which indicates normal operation. If the light blinks more than once every three seconds, you need to refer to the status light code list or label on the gas control valve.

Try lighting the pilot by following the lighting instructions given in the manual or on the heater and visually confirm the pilot can be lit. Next, set the gas control knob to "Pilot". Hold the control knob in while clicking the igniter button and looking through the inside water heater to the left. In order to see the pilot, you may have to dim the room lights.

If there is air in the gas line, it may take up to 90 seconds before the pilot lights and the status light begins to blink. Even after 90 seconds also, if the status light won't start blink, you have to release the control knob and turn off the gas valve.

You should wait ten minutes before attempting to relight the pilot. On newly installed water heaters, it may take 2 to 3 lighting attempts before the pilot lights and status light starts blinking.


Gas Control Valve Troubleshooting

Check out the Honeywell water heater status light codes, descriptions and possible remedies.

No LED Status - Electrical power not present

It may because of the control switch in the "OFF" position. Otherwise, the supply voltage will be interrupted. So, you have to slide the switch to "ON" position.

One flash and three-second pause - If the setpoint is in "Pilot" position then the pilot flame is detected. Turn set point knob to the desired setting. There might be gas control is powered and waiting for the setpoint knob to turn to a water temperature setting.

It's a normal operation. You have to adjust the thermostat to the desired temperature setting.

LED on continuously - Setpoint knob has been turned to the "OFF" position. Wait until the LED status goes out before attempting to relight.

When the pilot is lit, LED will go out and the control will function normally.

Two flashes and three-second pause - Weak pilot signal is detected.

The system will reset when the pilot flame is sufficient. Thermopile failure, unstable pilot, blocked/ restricted pilot tube, or opened resettable thermal switch might be caused this problem. You can check the troubleshooting tips in the service manual.

Three flashes and three-second pause - Insufficient water heating.

The temperature sensor could be out of calibration. Check and recalibrate it.

Four flashes and three-second pause - Excessive tank temperature.

Check for faulty gas control and verify if the temperature sensor is out of calibration.

Final Words

We hope our guide on Honeywell water heater status light codes and Honeywell water heater troubleshooting was helpful and it was able to get back your unit running. When you need to go through Honeywell water heater thermostat replacement or controller replacement, it's better to call a professional. Still, if your Honeywell water heater not working, refer to the manual and fix the issue.


Wednesday, October 13, 2021

How to Clean Pitco Fryer

 How to Clean Pitco  Fryer?

Perform the initial & daily cleaning of the fryer as described below. Also, you can check out the instructions for how to boil out a Pitco fryer.


Initial Cleaning

Generally, while shipping many parts of the Pitco fryer are coated with oil for protection. So, you should clean it before starting the cooking. If you clean it, oil coating will be removed and removes any foreign particles that are accumulated during shipment or storage. You can follow the cleaning process as below given.

 Fill the tank with water and add a mild detergent or one packet of Pitco fryer cleaner.

 Turn on your fryer and set the thermostat temperature to 200 degrees Fahrenheit. Leave the unit for 15 minutes to heat. Make sure the water level is not below the oil level mark on the back of the fry tank.

 With a fryer cleaning brush, you have to scrub the interior for removing the protective coating.

 After completion of fryer cleaning, turn off the main burners and turn the gas valve knob to the "Pilot" position.

 Now, drain the water from tank to a container that is suitable for hot water.

 When the fryer's tank is cooled, rinse it thoroughly with cool water. You need to continue to rinse it until the cleaner is removed completely from the tank.

 Wipeout all water with a clean dry cloth. You should wipe out the water thoroughly as any residual water causes hot oil to splatter out of the unit.

Note: Mild steel tanks must be wiped down or coated with oil to keep the tank free from rusting.

 Now, the tank is clean and you are ready to fill and operate your fryer.


Daily Cleaning

If you have done this procedure daily, your Pitco fryer will run effectively and give peak performance for years to come.

 Wipe down the exterior fryer: With a clean soft or microfiber cloth, you need to wipe up shortening that spills onto the exterior surfaces of the Pitco fryer. Better to do this when the oil is warm.

 To clean unit surfaces, use a mix of warm water and mild detergent. Make sure not to get water in the shortening. Rinse the fryer completely and dry thoroughly before use.

 Use a non-abrasive scouring powder or pad to clean stains if you find stains from grease or other food remnants.


Weekly Cleaning - How to Boil Out a Pitco Fryer?

The Pitco fryer has to be cleaned once a week. This is the right time if you want to replace the filter paper. The cleaning includes complete draining of the fryer and boils out.

You will need a large container to hold the volume of the tank. This container should also be able to withstand boiling water temperatures. When the oil is replaced by water or heating portion cleaning is completed, you have to shut off the fryer completely. This will prevent the heating system from coming on during the oil draining and water filling procedure.

You have to drain the oil from the fryer and discard it. You can also reuse it. Remove tube rack or mesh tube screens and remove any debris from the bottom of the fry tank. Clean them. Once the cleaning is completed, return mesh screens and tube racks to the fry tank. Close the drain valve and fill the tank with a mixture of non-caustic detergent and water. You can use cleaner for best results.

Restart the fryer. When the temperature of unit gets 100 degrees centigrade, it will go to "Boil" mode and bring the water to a slow boil. Once the water is at a slow boil, turn off the unit.

Soak the fryer for 20 minutes to soften shortening deposits and carbon. By using a fryer brush, remove any residue from heating tubes, tank, and sidewalls. You need to perform standard daily cleaning after scrubbing the tank.

Remove the filter from the unit. Next, slide a container to catch the water under the fryer so that the pipe which is normally aimed into the filter pan is aimed into the container and open the drain valve.

Drain the hot water to the taken container and rinse the fry tank with clean warm water.

Wipe the fry tank dry with a clean cloth. After that, close the drain valve and remove the container. Now, refill the tank.

Tuesday, October 12, 2021

Trane Heat Pump Reviews

Trane Heat Pump Reviews

Trane has been manufacturing heating, ventilation, and cooling equipment since 1881. Trane has a reputation of being a quality manufacturer with its products being able to last for years. With that said, Trane heat pumps reviews are mostly favorable.


What is Trane Heat Pump?

A Trane heat pump is a device that absorbs heat from the air and transfers it to the inside. It works by pulling in cool outdoor air and heating it before transferring it to your home's heating system. Because the heated air is dry, you can use a dehumidifier that produces less humidity.

How Does Trane Heat Pumps Compare to Other Brands?

Trane is dedicated to provide high-quality, innovative, and reliable systems to facilitate its customers. Here, we have given some key points that make Trane heat pumps stand out from the competition.

Unique designs

Trane heat pumps are unique because they build and test their parts. The members of the Trane company use innovative ideas to craft their heating systems way beyond regular standards. That's why Trane's name got popular among others. However, Trane products will be provided with innovative, unique and high-quality.

Extreme Testing

Trane follows a rigorous testing process to ensure that each of its products is strong, efficient and durable. For testing, the products will put through up to 4 months of extreme cold and blistering heat. While other products are put through over 2500 continuous hours for rigorous testing. Moreover, they encase Trane units in solid ice to ensure they keep running. This testing procedure helps the Trane HVAC units to provide the best experience.

Carefully Selected Specialists

Trane has a special position to be known as a Trane comfort specialist. They won't give everyone the honor of being their dealer. For installation, best service, employee training, and customer satisfaction, Trane has highly qualified professionals. This makes Trane company dedicated to provide the best services to their customers.

Energy Efficiency and Cost-Effectiveness

Trane heat pumps are extremely cost-efficient. They will save money from the start of your usage. These products have a higher HSPF rating, which means they create the most heat by utilizing the least amount of energy. With the higher Heating Seasonal Performance Factor (HSPF) rating. You can save more money. Trane is effective at that point.

Warranty

Each Trane unit comes with a simple "Base Limited Warranty". This warranty involves the parts that are damaged due to manufacturing faults. Normally, this base limited warranty range from 1 to 20 years depends on the product you bought.

If you register your product within 60 days of the installation date, you can get a "Registered Limited Warranty" without any additional costs. This warranty can range from 5 years to a lifetime. Moreover, they will offer an "Optional Extended Warranty that covers the cost of Trane heat pump parts and labor as well. All these warranty options, surely take Trane way ahead of their competition.

Trane Heat Pumps Models and Specifications

Here, SEER indicates Seasonal Energy Efficiency Rating, refers to cooling and HSPF indicates Heating Seasonal Performance Factor refers to heating.


Trane Heat Pump Pros

As Trane heating systems are durable, they will last up to 15 to 20 years if you maintain them properly. In all heat pump models, One of the most reliable Climatuff compressors is used in all Trane heat pump models.

Trane offers eight models of Trane heat pumps at various efficiency levels and prices. So, you can select the model that is suited to your heating and cooling environment.

Most heat pumps have capacities from 1.5 tons/ 18,000 BTU to 5-ton tons/ 60,000 BTU so that you can arrange properly sized to your building.

Trane Earthwise hybrid heat systems come with an ideal combination of a heat pump and a gas furnace for homes in very cold climates.

Trane comfort-R technology works effectively in dehumidifying your home during air conditioning cycles.

All Trane heat pump models are energy-star rated and rebates are offered by many companies across the United States when you install one of the more efficient models of Trane.

Trane's Wifi-connected thermostats can be controlled from the smartphone using the Trane app.

Cons of Trane Heat Pumps

Trane's most efficient heat pump XV20i with 20 SEER/ 10 HSPF is not much efficient than other competitors. Other competitor heat pumps have build with high SEER and HSPF factors.

Trane heat pumps have more costs than Goodman, Amana, Air-Flo and Payne.

Trane warranties on the best models of heat pumps are average. This is somewhat less compared to other brands such as Amana, Goodman, Maytag, Lennox, etc. These brands have longer warranties and include entire product replacement.

Once you have selected the right Trane heat pump depends on your climate, make sure it is sized properly. Don't install the system with too much or too little capacity as it creates many problems. So, you should decide the size before purchasing. However, hope this Traneheat pump reviews guide helped you understand your options.


Trane Furnace Troubleshooting

Trane Furnace Troubleshooting

Trane furnace parts is one of the most reliable heating systems in existence. Every most reliable furnace runs into problems from time to time. So, you may get Trane furnace problems also. You can fix some common problems easily yourself. If you are unfamiliar with fixing the basic issues of your furnace, follow our Trane furnace troubleshooting tips and save money as well as time.


Electric Furnace is Blowing Air but Not Heating

Occasional problems like blocked vents and incorrect thermostat settings may interfere with heating efficiency. Follow the below troubleshooting steps that may solve your problem.

First, you should verify the thermostat settings and it is set to "Heat". If your thermostat has a fan button feature, keep it in the "ON" position.

Still, your furnace not producing heat, you need to increase the temperature point. Choose a temperature setting that is higher than the indoor temperature displayed on your thermostat.

Some thermostats have recommended temperature set points that you have to follow. So, refer to your device’s manual to get additional troubleshooting tips.

If your device not regulating temperature properly, you have to reset the thermostat. If your thermostat has a reset button, simply press it for a few seconds and then release it. However, the resetting thermostat varies depends on the model. So, it's better to refer to your owner's manual.

Now, check the vents and remove obstructions if any that could be blocking airflow. Normally, blocked vents can limit the efficiency of your Trane furnace.

When Heat Not Coming from Trane Gas Furnace

If your furnace does not produce heat from vents when it turn on, it's not a difficult problem. Usually, if your gas furnace doesn't blow hot air, it means that there is a problem with your gas. Your device can't heat the air without supplying energy. Hence, you have to check whether the gas is connected and flowing correctly or not. If not, correct it.

n addition, you will need to verify the pilot light may have gone out. It is a small flame that ignites the main furnace flame. You can get the detailed instructions related to relighting the pilot in the manual. Once verify that the main gas supply line might be turned off.

Examine the drain pan.

All times it may not because of the ignitor itself. Sometimes there is standing water in the drain pan of your Trane furnace. Then, your system will not run to prevent the risk of overflowing nothing but the ignitor won't work. Clean the pump. If it doesn't help, you need to replace the pump assembly.

Check the Ignitor Sensor

The ignitor sensor intimates the furnace when it is safe to ignite. When this sensor senses a flame, it tells the device that it is safe to turn on the gas supply. However, sometimes, it can become dirty and unable to sense the flame. Then, it needs to be cleaned.

Additionally, you need to remember the age of ignitor. Normally, ignitor in the furnace will not work as long as the furnace. Over time, the ignitor will start to lose functionality. You have to change the ignitor if needed.

Final Words

Most of the time, modern Trane furnaces are reliable and have less problems. However, you can fix some basic and common Trane furnace problems easily. Hopefully, these Trane furnace troubleshooting tips will help you to determine the issue and it's solution without much work. If the above tips have not helped to find the source of your problem, then contact an experienced technician.


Sunday, October 10, 2021

How To Fix Noisy Dishwasher

                                                        How to fix noisy dishwasher

A foreign object may be stuck inside the pump or chopper blade area. 

It could happen while cleaning. When a piece of the dish is broken, it will fell straight into the bottom of the unit. Then, it lodged around the machine drain impeller.

If you are getting odd grinding or vibrating sounds during a cycle, then open the door and allow the steam to dissipate. After that pull out the bottom rack and check for any dish parts, glass, or food items in the chopper blade area or pump of your dishwasher.

While reaching the bottom compartment of the dishwasher, you need to remove the internal parts. In that time, you should check for debris on particular components. Make sure they would be cleaned if there is grease or debris build-up.


Insufficient water sprays into the dishwasher.
If there is no sufficient water sprayed into the machine, you can hear a weird grinding noise. So, you will need to verify the inlet valve clogs or any other issues which are preventing water from flowing into the machine.

Dishwasher Making Droning Noise
If your dishwasher makes continuous drone like sounds or the dishwasher makes high pitched noise, then check for the bearings on the circulation pump. When circulation pump bearings are damaged, you can notice these types of sounds.  

Dishwasher circulation pump noise - The water pressure will not be generated through the spray arms when this pump motor bearings are faulty. Replacing the circulation pump bearings is the best way to fix the dishwasher high pitched noise. It also stops the continuous droning,

Dishwasher Making Buzzing Noise
Is your dishwasher making loud buzzing noise? It could happen when dirty water is pushing down the drain. Moreover, this noise is common during the wash cycle as the soft food disposal unit grinding down food particles.
If the buzzing noise is turning into a banging sound, check for the possible causes below.

Spray arms might be hitting the dishes. 
When the spray arms rotate in a circle, you can notice a rhythmic banging. You can fix this by re-adjusting the dish places in the machine. If the banging inside the unit is non-rhythmic, you have to call a plumber to fix the issue.
Most likely, you are experiencing a water pipeline hammer knock sound. It may happen because of sudden valve shutting leads to rapid bursts of water to rattle pipes such that they will bang against the surrounding.

Dishwasher Making Rattling Noise
Rattling sounds are normal when your machine is running. When there are loose forks or dishes that touch each other in the dishwasher, you will get a rattling noise.
Moreover, rattling is normal if there is no water in the dishwasher or if you have used the unit for a long time. Try adding some water to the machine tub to fix the issue.
If rattling becomes too loud, then the cause could be a faulty wash motor.
Run an empty wash cycle in the unit to examine the motor. If rattling noise occurs, the cause could be the faulty motor. Other causes include blocked filter, clogged drain, etc. You have to check and fix the respective issues.

Final Words
If you are not able to fix your dishwasher noise due to technical failures, then contact a professional. We hope that our post on how to fix noisy dishwasher helped to quickly resolve the issues. For further more assistance, you can check your dishwasher manual. If you want to buy any Dishwasher Parts, find them at PartsIPS from various manufactures

Friday, October 8, 2021

How To Clean Manitowoc Ice Machine

 How To Clean Manitowoc Ice Machine

On a customary timetable, a Manitowoc ice machine ought to be cleaned once like clockwork of 6 months. Notwithstanding, there might be times inside that range that require a cleaning of the ice machine. Moreover, you should clean the machine quickly in the event that it has not been on a normal half year upkeep cleaning plan. Likewise, clean the outside of the machine and the encompassing floor region as often as fundamental.


Ice Machine Cleaning

To clean the ice machine, start by eliminating the screws toward the edges of the ice machine's top cover, utilizing a screwdriver. Eliminate the cover. Lift and eliminate the machine's front entryway or, contingent upon the model, essentially open the front entryway. Sit tight for the finish of a gather cycle, when the ice tumbles down from the evaporator, and flip the machine's flip change from ICE to the OFF position.

Manitowoc Ice Machine's Bin Cleaning 

The delivering ice needs to stores into either an ice receptacle or ice gadget until it is prepared for use. Since your ice supply will invest a large portion of your energy in there so keep it clean. Nonetheless, every day cleanings are must to keep away from any wellbeing code infringement. 

Shape and ooze are the most widely recognized impurities that you will find in your ice canister or allocator. By and large, these two impurities for the most part exist in dim and clammy spots. Clean ice is something essential to consider, then, at that point, you will not serve polluted ice to the clients. 

You can utilize an antimicrobial specialist to forestall the development of shape and ooze. Most Manitowoc ice receptacles are comprised of vinyl and plastic with the goal that it is not difficult to eliminate any foreign substances. Bigger ice canisters are made with a hardened steel polyurethane inside, which is likewise easy to clean. The most ideal way of cleaning the ice receptacle is to utilize an EPA-enrolled more clean.

Manitowoc Ice Machine’s Evaporator Cleaning

1.Open the front panel of the ice maker.
2.Ensure all ice is out of the ice bin.
3.Now, tap the "Clean" button on the touchpad. It looks like a hand holding a washrag.
4.Press "turn off when complete" when prompted.
5.The touchscreen will count down as the water trough refills for about a minute.
6.When indicated by the touchscreen, you have to add cleaner to the ice machine. Pour the cleaner 7.between the water curtain and the evaporator. Check the instructions for cleaning your Manitowoc ice 8.machine for the right amount of cleaner to add.
9.Now, click the "chemicals added" button on the touchpad when the above is done.
10.Let the clean cycle run for 24 minutes or until you get confirmation by the touchscreen.

Final Words
Manitowoc ice machine cleaning frequently helps to keep your ice supply sanitary. You should use factory-approved ice machine cleaner and sanitizer. For further more queries, you can refer to the owner's manual. Otherwise, contact the manufacturer's support team. If you need to buy any Manitowoc replacement parts, choose PartsFPS and order online.

Trane Furnace Troubleshooting

Trane Furnace Troubleshooting

Trane furnace is one of the most reliable heating systems in existence. Every most reliable furnace runs into problems from time to time. So, you may get Trane furnace problems also. You can fix some common problems easily yourself. If you are unfamiliar with fixing the basic issues of your furnace, follow our Trane furnace troubleshooting tips and save money as well as time.


Trane Furnace Troubleshooting Guide

Is your Trane furnace not turning on or not blowing hot air? Do you have Trane furnace ignitor problems? Find the solutions below.

Furnace Won’t Turn ON

Is your Trane furnace fail to turn on when you adjust the temperature? It is easy to detect the problem correctly. If your device is completely not turning on, then there could be an issue with the circuit breaker or with the thermostat.

Your furnace's circuit should be turned on. If the circuit is off, just restore the power. Also, check the response of the thermostat. If none of the before didn't help you, simply call a technician.

Electric Furnace is Blowing Air but Not Heating

Occasional problems like blocked vents and incorrect thermostat settings may interfere with heating efficiency. Follow the below troubleshooting steps that may solve your problem.

First, you should verify the thermostat settings and it is set to "Heat". If your thermostat has a fan button feature, keep it in the "ON" position.

Still, your furnace not producing heat, you need to increase the temperature point. Choose a temperature setting that is higher than the indoor temperature displayed on your thermostat.

Some thermostats have recommended temperature set points that you have to follow. So, refer to your device’s manual to get additional troubleshooting tips.

Check for the clogged air filter.

To prevent the ignitor type of problems, you should change the air filter regularly. When the air filter is clogged, the furnace will no longer ignite. So, it's the best way to check the air filter when your ignitor not working.  

Inspect the Gas Supply

When there is a problem with your gas supply, it causes your furnace ignitor to fail to ignite. If no problem is found with your home's gas supply, then consider that there could be an issue with the gas supply to your Trane furnace. Contact an expert to fix the issue.

Check the Ignitor Sensor

The ignitor sensor intimates the furnace when it is safe to ignite. When this sensor senses a flame, it tells the device that it is safe to turn on the gas supply. However, sometimes, it can become dirty and unable to sense the flame. Then, it needs to be cleaned.

Additionally, you need to remember the age of ignitor. Normally, ignitor in the furnace will not work as long as the furnace. Over time, the ignitor will start to lose functionality. You have to change the ignitor if needed.

Final Words

Most of the time, modern Trane furnaces are reliable and have less problems. However, you can fix some basic and common Trane furnace problems easily. Hopefully, these Trane furnace troubleshooting tips will help you to determine the issue and it's solution without much work. If the above tips have not helped to find the source of your problem, then contact an experienced technician.


Wednesday, October 6, 2021

How to Clean Hobart Dishwasher

 How to Clean Hobart Dishwasher

Spot a cup of white vinegar in a dishwasher-safe compartment on the upper rack of the machine. Run the dishwasher through a heated water cycle. This will wash away oil and grime and eliminate smelly scents, as well. Preparing soft drink flush Sprinkle one cup of heating soft drink across the lower part of the dishwasher.


Turn off power

When you need to clean, remove parts and remove waste, you should turn off the power. It is always a good practice to reduce the risk of accidents. Although, generally, commercial dishwashers will run automatically when doors are closed or with switch on.

Run a vacant dishwasher with vinegar: It's a similar idea as running a vinegar load in your clothes washer. You basically throw a cup of white vinegar into the lower part of an unfilled dishwasher and run an ordinary cycle. It wipes out old food particles to keep your dishwasher smelling new.

Use the recommended detergent

At the point when you are hoping to lessen your day by day operational expense, less expensive cleanser powders might entice you. Thus, don't go astray from your maker's suggested cleanser.

When cleaning any dishwasher, you should eliminate and exhaust all piece bins, guarantee wash and flush arms are liberated from deterrents and pivot uninhibitedly, and wipe down inside and outside surfaces.


1.Drain the machine. 

2.Eliminate and check the wash and flush arms. A few models have crush buttons while others have hand screws for simple expulsion. 

3.Eliminate every one of the sifters and wipe them out to eliminate any food deposits. 

4.Clean the outside and inside of the dishwasher with a moist material. 

5.Reposition all parts so your machine is prepared to utilize the following day. 

6.Leave the entryway somewhat open to permit it to ventilate during off hours.

Conclusion

None of the steps mentioned above on how to clean Hobart dishwasher are difficult. So, you can follow them to keep your Hobart dishwasher clean and prolong it's life. However, when cleaning a dishwasher, you have to follow some manufacturer's instructions that are given in the manual.


Tuesday, October 5, 2021

Air Conditioner Troubleshooting

 Air Conditioner Troubleshooting

At the point when warm climate hits and the hotness is on, the last thing you need is for your cooling to be off. It's fundamental to keep up with consistent solace in your structure to keep your occupants content. Here are the absolute most pervasive issues that you can keep away from by following good judgment functional methods and with routine private cooling support.


If the the ac wont turn on

At the first spot on your list of fears when you start your cooling investigating survey may be that you'll turn on the framework and hear nothing and feel nothing. The absence of force could be something as straightforward as a blown wire or a stumbled electrical switch, which means you'll need to reset the electrical switch or supplant a blown use. It likewise could be the aftereffect of loosened up or wiring or indoor regulator issues.

LOW EFFICIENCY LOW REFRIGERANT EQUALS 

While cooling investigating uncovers a failing to meet expectations unit, that can be the aftereffect of low refrigerant. In the event that the refrigerant level is low, it typically implies it was either undercharged at establishment or it has a hole. In the event that you notice your structure isn't cooling as expected or the air is to some degree tacky, a low refrigerant level could be the guilty party. Without the right refrigerant level, hotness and stickiness can't effectively be eliminated from the air. The refrigerant is the soul of your cooling unit and is likened to the engine oil in your vehicle.

Air Conditioner Not Blowing Cold Air

In the event that your Nordyne AC not blowing cold air, you need to confirm the indoor regulator settings. Guarantee the indoor regulator is set to "cool" mode. Decline the temperature set highlight underneath the room temperature showed on the screen. Allot the fan change to "On" or "Manual" mode. You need to set the fan switch back to Auto mode if the wind stream is limited. Ensure that there are no targets, for example, toys, window hangings, and furniture at the air supply grilles in the house to get adequate wind current.

Conclusion

That is about normal Nordyne climate control system issues and arrangements that you can look during busy time use. These issues should be tackled to stay away from greater AC issues. With our Nordyne AC investigating guide, you can securely evaluate issues and get them settled. For a particular guidelines for your model, you can allude to the Nordyne forced air system manual. In any case, standard support is the way to forestall normal issues.

Monday, October 4, 2021

Maytag Stove Troubleshooting Guide

  common problems of stove

In certain circumstances, a lethargic warming oven or cooktop may make a significant issue whatever model you have. In case you are utilizing a gas oven, the issue may due to the burner openings being stopped up with garbage. On the off chance that your cooktop is leaving the fire as little and powerless, relax, you can fix it effectively with the entire burner exhaustive clean. 

Mood killer the apparatus and eliminate the meshes just as burner covers. Douse meshes and burner covers in foamy hot water. Utilizing a hardened brush, you need to clean the surfaces. Wipe down the outer layer of the oven with the soggy wipe too. With the toothpick, you should eliminate food or any trash from the gas valves. You can utilize heating pop and vinegar glue to clean the apparatus every day.


Regardless of whether you utilize a reach or an implicit cooktop, the burner is one of the main apparatuses you own, and when it begins giving you inconvenience, it's hard not to freeze. Without a burner, how might you put your mother's on the map bean stew? How might you prepare your  flapjacks in the first part of the day or a barbecued cheddar when you return home late

The possibility of a messed up burner is uneasiness instigating, yet we're here to tell you not to freeze. Most normal burner issues can be effectively fixed with a little TLC, leaving your burner and your late-night snacks all set. The following are five normal issues your burner may confront and their most normal arrangements.


Standard electric igniter. 
stoves with electric igniters incorporate numerous more seasoned models with standard (unlocked) burners. With these and standing pilot ovens, access the functioning parts by eliminating the burner grinds and lifting up the cooktop cover; most are pivoted at the back and have a metal prop stick, very much like a vehicle hood.

Burner cleaning 
On stoves with unlocked burners, lift the cover, and eliminate the burner gathering—it should lift straight up. Clean inside the burner tube (streak tube) with a little tube shaped brush. Utilize a sewing needle to clean the little pinholes (streak ports) on the burner head and the bigger ports encompassing the burner under its edge. Put the gathering in a difficult spot similarly as it was, then, at that point, test the burner. On the off chance that your oven has fixed burners, you can clean the blaze ports and burner ports with a needle, yet you can't access or eliminate the burner gathering.

To know more: click here

Sunday, October 3, 2021

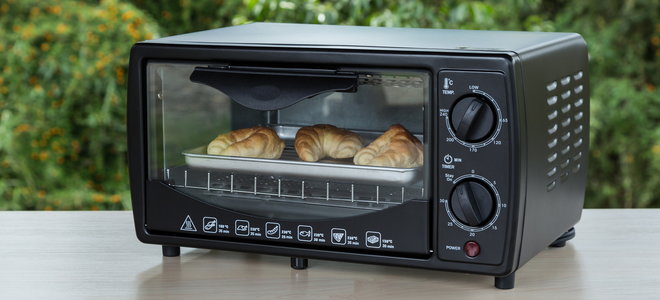
Simple Uses of Oven Toaster Grillers

 If there may be any equipment that may satisfaction you with masses of delicacies, it might genuinely be an Oven Toaster Griller, typically referred to as OTG. An OTG isn't much less than a boon for those who like to have bakery meals. Whether you need to bake bread or cake, grill cottage cheese or fowl kebabs, prepare dinner dinner pizza, toast sandwiches or buns, the fine guess is an OTG. It can reheat, hold warm, grill, barbecue, and bake meals gadgets. Yes, you could make the yummiest muffins, patties, breads and desserts the use of this surprise equipment.


Essentially a smaller model of a conventional oven, an OTG capabilities heated coils on the lowest and at the roof of the oven. You have the selection to warmth both one or each coils of your oven. This heating detail converts electric powered strength into warmth to create excessive temperatures to bake the meals. The Oven Toaster Griller has a thermostat which facilitates in controlling the temperature whilst making sure that the meals is cooked or heated well. OTGs are acknowledged for his or her delectable meals, which calls for a bit more time to be cooked. Unlike microwaves, OTGs take greater time however their strong point lies of their lip-smacking dishes.

When you've got got offered or making plans to shop for an OTG, it's miles critical to recognize its makes use of beforehand. With each equipment, you get an coaching guide. Do examine that guide very well due to the fact specific OTGs may also have specific settings and capabilities. To make it a bit less complicated for you, right here we've jotted down a few makes use of of OTGs which you need to realize.

Baking

Baking is a method of making ready meals the use of dry warmth, typically in an oven. In this process, the warmth is regularly transferred from the floor of desserts, cookies, and breads to their center. While baking desserts, cookies, bread and pies, make certain that the oven is preheated to the proper temperature because the recipe demands. It is the simple rule for buying best results. When baking, activate each pinnacle and backside warmth of your oven.

Toasting

Toasting is a widespread technique of browning breads via way of means of exposing them to radiant warmth. It modifications the taste and texture of the bread, making it crunchier and less attackable to unfold toppings over it. You also can toast breads in a toaster but oven offers the fine results. When toasting pizzas, sandwiches or breads in an OTG, use the putting for pinnacle warmth. star toaster parts

Grilling

Grilling is a way of cooking in which dry warmth is implemented to the floor of meals, which can be from above, beneath or from the side. It generally requires a good sized quantity of direct, radiant warmth. Grilling is used for cooking meat and greens quickly. In an OTG, skewers are supplied to grill meals. Using the skewers and the basting tray to trap all of the drips, you could make kebabs and tikkas effortlessly. Use the putting that offers pinnacle warmth and rotate the meals gadgets often to grill them to perfection. commercial griddle manufacturers

Reheating

Reheating as all of us realize is heating the cooked meals again. Some meals gadgets may be effortlessly reheated on GAS cooktops, however a few can not. In such situations, ovens are exceptional for reheating. Food gadgets like samosas, patties, pizzas, pastas and plenty of others may be effortlessly reheated in an OTG.

Conclusion

An Oven Toaster Griller is a exceptional equipment for any kitchen. You can not simply bake, however also can grill, toast and reheat in an OTG. It can help you in making delicious dishes with much less oil.

Monday, July 19, 2021

Maintenance Tips: Conveyor Toast Troubleshooting

 The first matters to test in case your toaster isn't always running is that it’s plugged in, after which take a look at the circuit breaker; ensure the toaster manipulate is on. If the warmth is approaching however it’s simplest toasting one side, it’s possibly you've got got a burnt-out detail. Heating factors are vital additives and commonly don’t require preservation for the duration of the existence of the unit.


However, if dirt and particles collect on them, they could slowly lose their toasting effectiveness; now and again they burn out. Cleaning the factors will rely upon which kind of detail your toaster has and the manufacturer’s advocated manner for cleansing them. In maximum cases, when you have a metal-sheathed detail, use a easy long-take care of twine brush to put off extra particles. (But first, unplug the unit and permit it cool down). parts star

Glass tube or quartz factors are extra fragile and as they collect particles, they’ll flip a cloudy color. Although this can seem to weaken the effectiveness of the factors, which use infrared technology, it definitely doesn’t. According to a seven-yr take a look at accomplished at a main brand’s facilities, there has been no vast discount in heating ability if the glass tube changed into cloudy.

You’re definitely taking a piece of a chance in case you try to easy quartz factors; they could grow to be brittle with age. Element care and/or substitute is a activity for a provider tech. If factors get too protected in built-up particles, a provider tech can use a inexperienced scrub pad to softly put off and easy the factors, however he or she can be able to simplest do it whilst the factors are cool; warm factors are even extra fragile. The tech may actually have substitute tubes handy to get the unit jogging at the same time as cleansing the factors. Star Manufacturing Parts

If the unit heats up however the conveyor isn’t moving, it’s both blocked or the pressure motor has failed. The operator’s guide may have a troubleshooting manual which can stroll you via how to test the conveyor for blockage. A useless pressure calls for a provider call.

Make it a exercise to sell off crumb catchers daily. Otherwise the little particulates can building up and in the long run intervene with the mechanical workings of the toaster. As particles settles onto gears and shafts, and the temperature rises, those bits begin to caramelize and gunk up, inflicting the conveyor mechanism to misalign. Keep the unit easy and crumb free. Another not unusualplace criticism from operators issues bread sticking to the conveyor. This effects from excessively wet bread—in particular breads with a excessive sugar content—entering to touch with a warm conveyor chain. Conveyors paintings exceptional on breads which might be at room temperature, so frozen breads, or worse, breads pre-unfold with butter or different toppings are possibly to stick.

Monday, October 19, 2020

The Biggest Trends in Restaurant Griddle Maintenance We've Seen This Year

 Your griddle is a tremendous part of your eating place, and maintaining it in the correct situation is crucial in case you need to boom its lifespan. Even when you have a vintage griddle, those steps and hints will assist you to enhance the exceptional of your griddle and hold it in shape. Forgetting to hold your griddle maintained ends in rust, flakes, chips, and can even make your griddle lose the nonstick floor. For the ones of you who have a griddle this is damaged or malfunctioning, getting a preservation carrier that will help you out will prevent quite a few cash in case you don’t plan on getting a brand new griddle every time soon. 


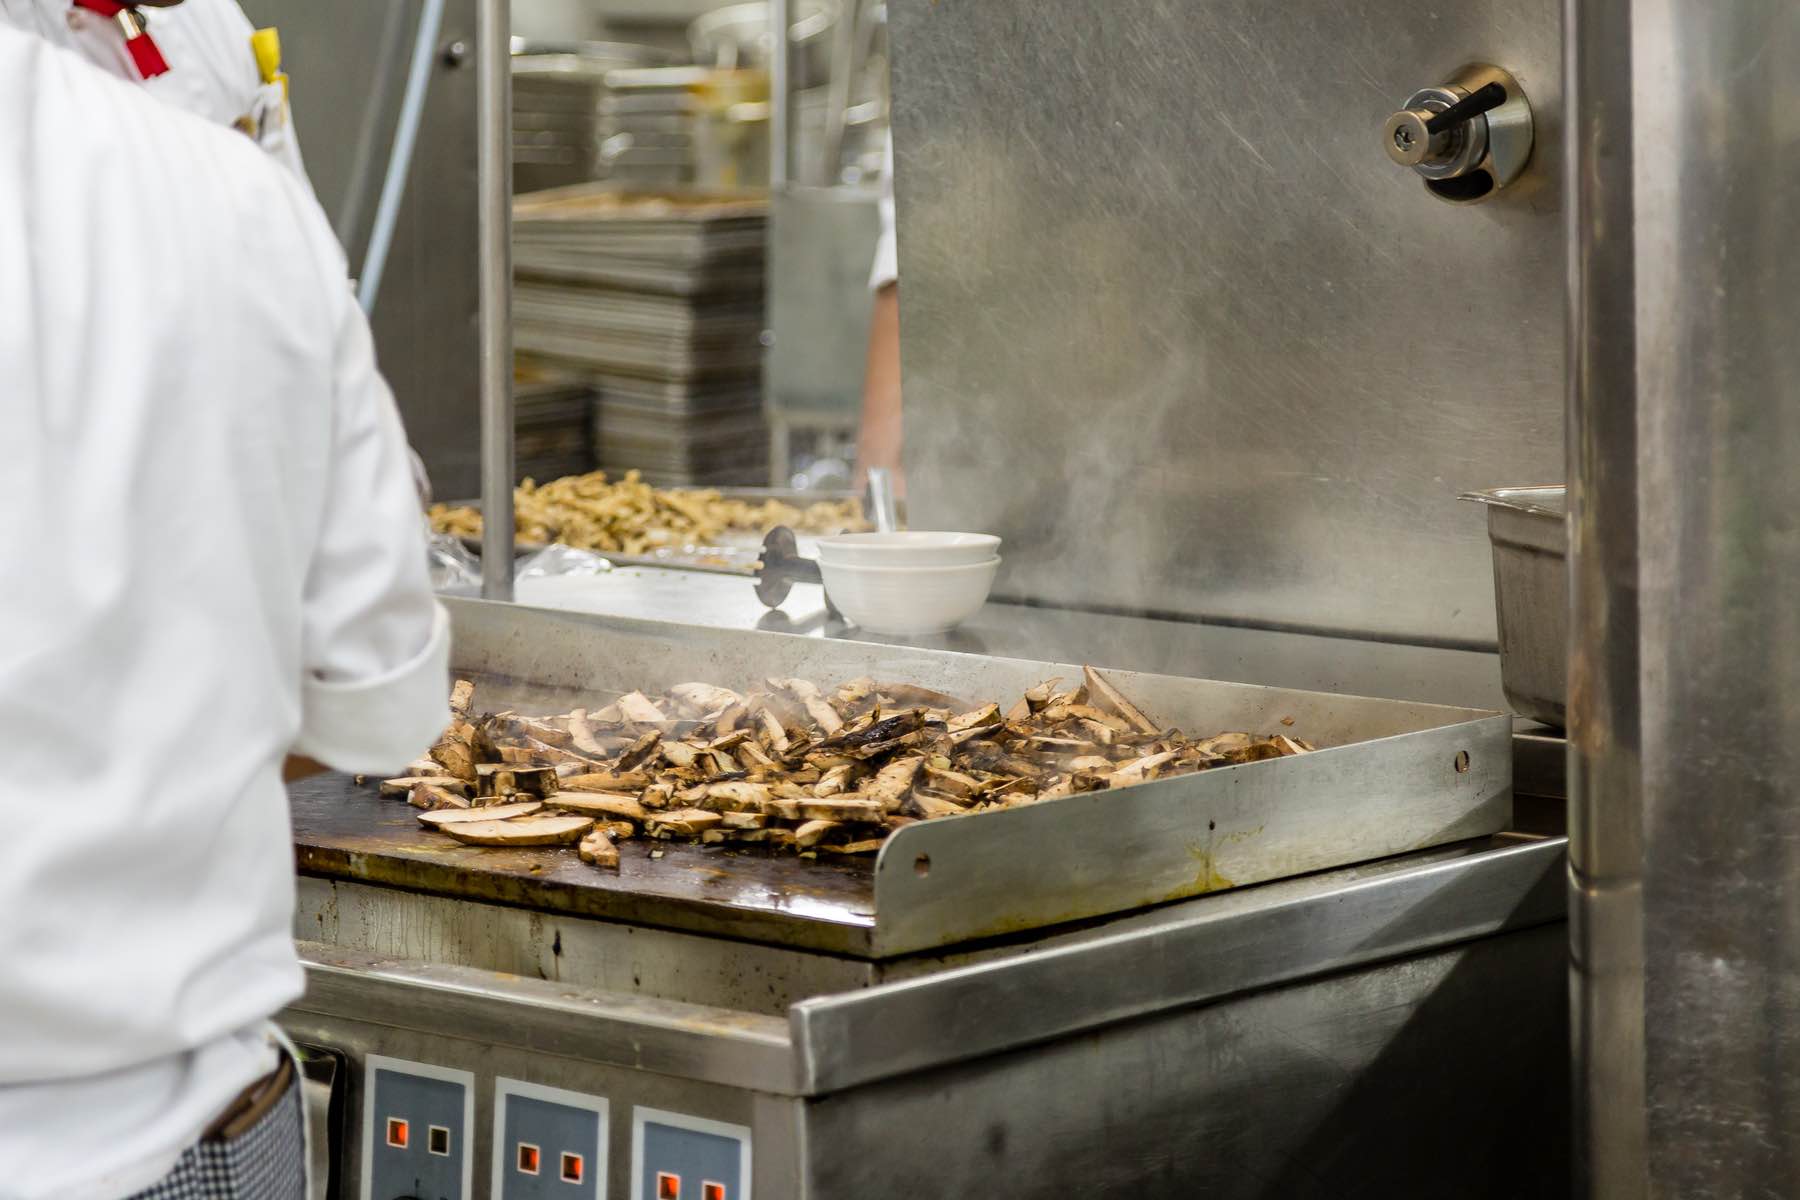
Unrecognizable male chef cooking medium red meat steak and veggies on the grill. Healthy extraordinary meals organized at the expert kitchen, closeup

Routine cleansing

As apparent as this could seem, giving your eating place griddle the ordinary cleansing it wishes may be very important. Cleaning has to be finished as a minimum as soon as a day. To easy your griddle the first-rate manner feasible and extraordinary short and clean, you could observe our little by little manual in a beyond article that turned into written called, “How to Clean a Grill- Step with the aid of using Step Guide.” As properly as informative, this newsletter additionally tells you the way to easy a griddle quickly and cleanly without the usage of chemical compounds.gas bbq burners spares


Unrecognizable male chef cooking medium red meat steak and veggies at the grill. Healthy extraordinary meals organized on the expert kitchen, closeup


Routine Maintenance

Every equipment wishes ordinary preservation, which means you want to have a person checking the electricity and basic performance of your griddle. It can be sudden what a preservation guy can locate earlier than you even begin to see a problem. When you've got got a repairman test your home equipment round as soon as each month, you could restore small problems which you didn’t even recognize had been there earlier than some thing massive breaks down.  the griddles


Best recommendations to offer your griddle an extended lifespan

Never use soaps or chemical compounds on the floor of your griddle

Make positive your griddle is preheated earlier than making any meals

  • Do now no longer go away any plastic or rubber boxes or cooking device close to the griddle
  • If you odor gas at once flip off the griddle and phone a preservation provider 
  • Do now no longer use metallic scrubbers or ones with harsh materials

Protecting your Griddle from Rust

Always dry your grill once you are finished cleansing

If you permit your griddle to dry on its own, it could purpose your griddle to rust up, especially if water receives stuck up in the grill. Always test each crack and area for your griddle to make certain there isn’t any water snuck up in there. You can typically dry your griddle first-rate whilst you operate a dry paper towel or skinny cloth.  commercial griddle manufacturers


Never go away meals in your griddle

Remove meals from the griddle on every occasion you're finished the usage of it. Old meals can smash the pinnacle of the griddle if now no longer looked after properly. This is why your griddle has to be wiped clean day by day in case you don’t need to purpose harm to the indoors or out of doors of the griddle. 

Thursday, September 10, 2020

7 Things You Should Not Do With How To Clean A Restaurant Griddle


Your griddle is a significant part of your restaurant, and keeping it in good condition is essential if you want to increase its lifespan. Even if you have an old griddle, these steps and tricks will help you to improve the quality of your griddle and keep it in shape. Forgetting to keep your griddle maintained leads to rust, flakes, chips, and might even make your griddle lose the nonstick surface. For those of you who have a griddle that is broken or malfunctioning, getting a maintenance service to help you out will save you a lot of money if you don’t plan on getting a new griddle anytime soon. 


Unrecognizable male chef cooking medium beef steak and vegetables on the grill. Healthy exclusive food prepared at the professional kitchen, closeup


Routine cleaning

As obvious as this may seem, giving your restaurant griddle the regular cleaning it needs is very important. Cleaning should be done at least once a day. To clean your griddle the best way possible and super quick and easy, you can follow our step by step guide in a past article that was written called, “How to Clean a Grill- Step by Step Guide.” As well as informative, this article also tells you how to clean a griddle in a fast and easy way without using chemicals. fry spares


Routine Maintenance

Every appliance needs routine maintenance, meaning you need to have someone checking the power and overall efficiency of your griddle. It may be surprised what a maintenance man can find before you even start to see a problem. When you have a repairman check your appliances around once every two months, you can fix small issues that you didn’t even know were there before something big breaks down. 


Best tips to give your griddle a longer lifespan

Never use soaps or chemicals on the surface of your griddle

Make sure your griddle is preheated before making any meals

Do not leave any plastic or rubber containers or cooking equipment near the griddle


If you smell gas immediately turn off the griddle and call a maintenance provider 

Do not use metal scrubbers or ones with harsh materials

Always dry your grill after you are done cleaning

If you let your griddle dry on its own, it can cause your griddle to rust up, especially if water gets caught up inside the grill. Always check every crack and space in your griddle to make sure there isn’t any water snuck up in there. You can usually dry your griddle best when you use a dry paper towel or thin cloth. Gas bbq burners spares


Never leave food on your griddle

Remove food from the griddle every time you are done using it. Old food can ruin the top of the griddle if not taken care of properly. This is why your griddle should be cleaned daily if you don’t want to cause damage to the interior or outside of the griddle.